2 Lbs
zucchini and yellow squash, quartered lengthwise
1 large
onion, sliced into thin wedges
2 Tbls
unsalted butter
½ tsp
salt
¼ tsp
pepper
¼ Cup
pecorino romano cheese or parmesan cheese
¼ Cup
fresh basil, sliced stacked and rolled in a pinwheel (aka chiffanod
)
Directions:
1. In a
large non-stick fry pan; melt butter over high heat. Add vegetables
and sear them until golden brown, (aka caramelized
I couldn’t resist putting that in there) this will take about 5
minutes.
2. Once
vegetables are done to your liking, add basil and pecorino.
3 lbs
baby red skinned potatoes, washed and quartered
4 whole
garlic cloves, peeled
1 Tbls
salt
1 tsp
pepper
¼ Cup
unsalted butter
Directions:
1 -2
Cups of milk or chicken broth (depending on thin or thick you like
your potatoes)
1.
Place potatoes and garlic in a large pot and cover with cold water.
Place lid on pot and bring to a boil. If pot begins to boil over on
to stove reduce heat to medium high or low boil. Boil until potatoes
are tender. This will take about 10 -15 minutes.
2.
Drain potatoes and place back in large pot. Add butter and place lid
back on pot to melt butter. Mash and add milk to potatoes and
continue mashing until you get desired consistency. Add salt and
pepper and taste to adjust to your liking. Potatoes always need more
seasoning than you think.
¼ Cup
toasted walnut, pecans or almonds (optional)
Directions:
1. Heat
butter in small pan over medium heat. Once butter is melted the
foamy milk solids will begin to toast. The melted butter will darken
and look like the color of maple syrup. This takes about 7 minutes.
2.
Place frozen green beans in a microwave safe casserole dish with a
lid. Sprinkle with salt & pepper and cover with lid. Steam
green beans in microwave on high for 5 minutes.
3. Add
brown butter to green beans tossing to coat. Place lid on casserole
and microwave for another 2 minutes on high or until green beans are
done to your liking.
Here's a great video on youtube I found that reminds you how to brown the butter:
1 large
40 oz can Sweet Potatoes, drained and mashed
¼ Cup
Sugar
½ tsp
Vanilla
1/2 tsp
Cinnamon
¼ tsp
Salt
2 Eggs,
beaten
¼ Cup
Milk
Topping:
½ Cup
All-Purpose
2 Tbls
Brown Sugar
2 Tbls
Unsalted Butter, melted
¼ Cup
Pecans (optional)
Directions:
1.
Preheat oven to 350 degrees.
2. In a
large mixing bowl combine all ingredients until well blended.
3.
Butter and 9X9 baking dish or 1 Qt casserole dish. Pour sweet potato
mixture into prepared dish.
4. In a
medium size bowl add topping ingredients and mix with a fork until it
resembles coarse crumbs. Sprinkle evenly on top of sweet potatoes
and bake uncovered for 25-30 minutes or until topping is golden brown
and sides of the pan are bubbly. Here's a different version of sweet potato casserole: (You can adjust your sweet potato casserole to your family needs... gluten-free, sugar free, low calorie, etc.)
The Filipino Fruit Salad
is a staple dessert to most Filipino parties. The usual ingredients
are canned fruit cocktail, condensed milk and Nestle cream. However, I don't suggest using Nestle
cream. It curdles and the liquid separates. I use the refrigerated Heavy
Cream (the same one used in making whipped cream). To cut the sweetness of the condensed milk and to give it a thick
and creamy consistency, use cream cheese. The fresh apples provides texture to the soft fruit and gives it a necessary crunch.
INGREDIENTS
1 6 pound can or 10 cups Tropical
Fruit Cocktail
2 cans mandarin oranges
1 can condensed milk
1 cup heavy cream
2 Granny Smith apples,
cubed
1/2 cup plain cream cheese
1/4 cup cheddar cheese, cubed
1/4 cup Maraschino Cherry Halves
(optional)
Shredded Coconut/Macapuno (optional)
1 Drain the Fruit Cocktail thoroughly.
2 Whip the
condensed milk, heavy cream and cream cheese together. Make sure it's well blended. (You may omit the cream cheese and just add more cheddar cheese to
cut the sweetness of the condensed milk if desired.)
3 Add in the drained
fruit cocktail and cheddar cheese.
4 Peel and cube the apples one
at a time, putting the apples directly into the salad as they are
cut. (To prevent browning of the cut apples, immediately integrate it in
the cream mixture or soak in a lemon ice water solution ‘til mixed.
5 Garnish with
cherries. (You can add some Macapuno or soft shredded coconut meat, if desired.)
1 1/3 pounds (4 medium) Russet or Yukon Gold potatoes washed, peeled, and cut into uniform 2-inch chunks* 1 teaspoon salt, divided 2 tablespoons warm butter 1/2 to 2/3 cup hot milk, half & half, or cream**
* Do not cut the potatoes into smaller chunks as too much water will be absorbed by the potatoes. After cutting the potatoes, immediately place in cold water to prevent discoloration of the potatoes.
** Buttermilk may be substituted.
Preparation:
In large saucepan, Add cut-up potatoes, 1/2 teaspoon salt, and just enough cold water until potatoes are covered; bring to a boil. Reduce heat to medium; cover and let simmer 15 to 20 minutes or until potatoes are tender when pierced with a fork.
While potatoes are cooking, either in another saucepan or microwave, heat butter. Also heat hot milk or cream to a simmer (do not boil) separately from the butter in another saucepan or microwave. NOTE: Do not add cold butter or cold milk/cream to when making mashed potatoes.
When the potatoes are cooked, remove from heat and immediately drain potatoes thoroughly in a colander. Return to saucepan; heat over medium-low heat approximately 1 to 2 minutes to dry potatoes, stirring occasionally. NOTE: Boiled potatoes left in water will start to jellify and may even increase in volume, becoming swollen and watery. That is why it is important to let the potatoes drain for a couple of minutes in a colander immediately after they are cooked.
In the same saucepan that the potatoes have been heated in, mash potatoes with a potato masher, potato ricer, fork, or beat with electric hand mixer until chunky. Stir in warm butter, remaining 1/2 teaspoon salt, and 1/2 cup of the hot milk. Add additional milk, a little at a time, if necessary, for desired consistency.
Note: Gluey or gooey mashed potatoes are caused by vigorous over mashing, as anyone who has tried to make the side dish in a food processor can attest. When potatoes are boiled, their starch granules swell. If those granules are broken too vigorously, the cells release copious quantities of starch, resulting in a potatoes with the consistency of wallpaper paste.
4 medium sweet potatoes, peeled and coarsely chopped Nonstick cooking spray/oil 1/4 cup (1/2 stick) butter 3 tablespoons packed brown sugar 1 teaspoon cinnamon 1/4 cup milk 1 teaspoon vanilla Salt and pepper to taste
SUGARED WALNUTS 1/3 cup packed brown sugar 1/2 teaspoon cinnamon 3 tablespoons butter, melted 1 cup chopped walnuts
For mashed sweet potatoes, place sweet potatoes in a large saucepan; cover with cold water. Bring to a boil. Reduce heat; cover loosely, and gently boil until tender, 10 to 15 minutes. Drain. Preheat oven to 350 degrees. Lightly coat a 2-quart casserole with nonstick cooking spray or oil. For mashed sweet potatoes, place cooked sweet potatoes in a large bowl. Add 1/4 cup butter, 3 tablespoons brown sugar, 1 teaspoon cinnamon, milk, and vanilla; mash until almost no lumps remain. Season with salt and pepper; transfer to prepared casserole.
For sugared walnuts, in a small bowl combine 1/3 cup brown sugar, 1/2 teaspoon cinnamon, and 3 tablespoons melted butter. Stir in walnuts. Sprinkle over potato mixture; bake until potato mixture is set and walnut mixture has browned, 35 to 40 minutes. Makes 8 servings.
PREP, COOK, DRAIN & DRY the GREEN BEANS Step-by-Step Photos: How to Cook the Green Beans If doubling or tripling the recipe means cooking the beans in batches, start each batch with fresh water; at minimum, re-salt the water with each new batch. Also, don't skip the drying process.
2 quarts (8 cups) water 1 tablespoon table salt (salt is key to the flavor so don't skimp; if you don't have table salt, use twice as much as the relatively 'less salty' kosher salt or sea salt) 1 pound fresh green beans, ends snapped, snapped into bite-size pieces
Bring the water to boil in a large pot or Dutch oven. While it comes to a boil, prep the beans. Fill a large bowl with ice water. Add the salt and beans to the boiling water. Cover and cook for 6 minutes or until crisp-tender and still bright green. (Be sure to cook the beans to your desired level of doneness; from here on, they will reheat but won't cook more.) Drain beans in a colander, then plunge into ice water to stop the cooking. Drain a bit in the colander again. Place a double layer of paper towels on a baking sheet, arrange beans in single layer to dry, top with a double layer of towels and pat to dry. Let continue to dry while finishing.
8 ounces baby portabella mushrooms (I like the color of the brown portabella but taste-wise, they're the same as white button mushrooms) 1 tablespoon unsalted butter 1 tablespoon fresh garlic, minced 1 teaspoon kosher salt or to taste Generous grind of fresh pepper or to taste 1 1/2 tablespoons flour 3/4 cup chicken stock 1 tablespoon dry sherry 3/4 cup half & half or heavy cream (don't use fat-free half-n-half, it won't thicken) Salt & pepper to taste
Clean the mushrooms; break off and discard the stems. (Better yet, use the stems to make a night-before-Thanksgiving mushroom soup.) Break the mushroom tops into pieces. (Breaking the tops into irregular pieces is important to the texture of this sauce for sliced mushrooms have a 'canned soup' texture.) Melt the butter in a skillet til shimmery. (To save a pan, use the pot used for cooking the beans.) Add the mushrooms, garlic, salt and pepper. Stirring often, cook til mushrooms begin to soften and exude their liquid, about 6 minutes. Stir in flour and cook a minute. A tablespoon at a time at first, add the chicken stock and sherry; bring to a simmer. Add the half & half, simmer til sauce thickens, about 10 - 15 minutes. Taste and adjust the seasonings. Stir in the cooked beans til they're evenly distributed throughout the sauce.
MIX the TOPPING Step-by-Step Photos: How to Mix the Topping and Bake Note: The quantity below is 'half' what the inspiring recipe used; the full amount seemed way over the top to me, half was plenty and hardly skimpy for the shallow quiche dish I use to bake this in. I use the quantity below even when doubling the beans and the mushroom sauce; how much is needed seems to be a function of the size of the serving dish; 'half' is perfect for that shallow quiche dish.
1 slice good whole grain bread (I use this Light 'n' Fluffy Homemade Whole Grain Bread but any good whole-grain bread will work) 1 tablespoon unsalted butter 1/2 a 2.8 ounce can of French fried onions 1/8 teaspoon table salt 1/16 teaspoon freshly ground black pepper
In the food processor, process the bread, butter and seasonings in about 10 quick pulses. Stir in the onions -- but don't process. If making ahead, transfer to a storage container and refrigerate.
BAKE TO BAKE RIGHT AWAY Preheat oven to 425F. Transfer hot bean mixture to a greased quiche pan or baking dish. Top the beans with the topping mixture and bake uncovered for 15 minutes.
TO BAKE LATER Transfer bean mixture to a greased quiche pan or baking dish (hold off on the topping mixture), cover with plastic wrap and refrigerate. Return to room temperature. Remove plastic wrap. Heat in 425F oven uncovered for about 10 - 40 minutes until hot and bubbly. (Ten minutes is enough for a shallow dish like a quiche pan. Allow more time for a deeper dish.) Add topping and bake for another 15 minutes. ALANNA'S TIPS & KITCHEN NOTES FROZEN BEANS What about frozen green beans? In 2007, I had no choice but to make this with frozen whole (not Frenched) beans and they worked just fine; you can skip the ice water step but I do recommend the drying process. Still, fresh beans are preferred. PRE-CUT BEANS What about bags of precut (supposedly) fresh beans? These never look that fresh, need to retrimmed anyway, and pound for pound are so expensive. It takes just a few minutes to snap the beans. CONSIDER AT LEAST A DOUBLE BATCH I nearly always make a double batch, using two pounds of green beans. This fills a shallow quiche pan that's my standard serving dish (what's pictured) that holds about five cups liquid. TIMING for DOUBLE & TRIPLE BATCHES For larger gatherings, I've doubled and tripled this recipe. The prep is easy enough but the timing changes since it takes longer to bring the casserole to room temperature (allow 3 hours for a triple batch) and longer to heat it through (allow at least 30 - 40 minutes for a triple batch, especially one prepped in advance or not quite at room temperature). TOPPING SUBSTITUTES I really like the topping from the original Cook's Illustrated recipe but know that not everyone can bear the idea of canned fried onions. A suitable substitute is 3/4 cups whole-grain fresh bread crumbs browned a bit in 1 tablespoon butter and seasoned generously with salt and especially pepper. Another suggestion comes from Elizabeth: "We've sautéed onions in oil until they are beginning to colour and then added flour to crisp them up. They are easily as good tasting (if not better) than canned onions and WAY better for us. Because who knows how many nightmares of chemicals and preservatives are in canned onions?" If it were me, I would still toss Elizabeth's onions with good bread crumbs and plenty of salt and especially pepper. I've also had great luck with the fried onions from Trader Joe's -- no ugly ingredients. From A Veggie Venture Blog
Fresh pasta contains only three ingredients: flour, salt, and eggs.
Semolina, a high-protein flour made from Durum wheat, makes better pasta than all-purpose flour. It creates a stronger gluten structure, allowing for more pliable dough.
Salt provides flavor, and the eggs create richer dough, along with binding the dough together.
Olive oil is sometimes added for flavor, or, if the pasta is to be dried, water is used instead of eggs.
Kneading the dough creates the important gluten structure that holds the pasta together. Using a stand mixer with a dough hook simplifies the process: just add the ingredients and mix. Kneading by hand takes more effort, but is still quite enjoyable (and a good workout).
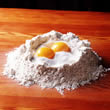
Start with a large, clean work surface. Make a mound of the flour and salt with a well in the middle.
Add the eggs to the well, and start stirring with a fork, slowly incorporating all the flour until the dough comes together.
Knead the dough until it is soft and pliable. This might take several minutes.
Rolling
A pasta machine is a pasta maker's best friend. Just follow these tips for flawless dough:
Use the machine for the final kneading. Run the dough through the widest setting on the machine, fold into thirds, and roll again. Continue this process until the dough is shiny and elastic.
Work the dough through the settings of the machine until the desired thickness is reached.
Four hands are better than two: enlisting some help with turning the handle of the pasta machine will make this job much easier.
If you're working with only a portion of the dough at a time, keep the remainder wrapped in plastic to prevent it from drying out.
Rolling by hand works, too, and can easily be done with just a rolling pin and a large work surface.
Just as with a pasta machine, roll the pasta dough flat, fold into thirds, and roll flat again, until the dough is shiny and elastic.
Make sure the dough is in small enough batches to be workable. (Slightly smaller than your fist is a good gauge.) Keep extra dough covered in plastic until you're ready to work with it.
Roll to the final thickness, and form desired shape.
Fresh pasta allows you to choose your favorite shape of pasta, in any size you choose.
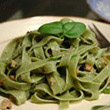
Any sort of thin, flat pasta is possible when making pasta by hand, including lasagna, fettuccine, or linguine.
Complex shapes, such as penne, spaghetti, or macaroni requite special cutters and attachments added to the pasta machine.
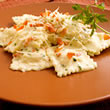
Filled pastas, such as ravioli or tortellini, are perfect for fresh-made pasta. You can fill them with anything you choose, and create the best pairing possible between filling and sauce.
Pour
scalded milk over shortening, sugar and salt.
Add
mashed potatoes, cool to lukewarm.
Dissolve
yeast in warm water and add to first mixture. Add eggs and flour.
Knead until smooth. Let rise until double in bulk. Shape into rolls and let
rise again.
Bake
at 350o for 20-25 mins. (1st
rise: 1-1/2 —2 hrs; 2nd rise: 30-45 mins.)
Split
the rolls in half and spread the butter mixture on both sides.
Layer
each roll with the ham and cheese.
Replace
tops, place on a cookie sheet and cover with foil.
Bake
at 400o for 10 - 15 minutes till warm.
Note - these rolls can be as large or small as you wish.
Kaiser or sandwich rolls make a "man size" sandwich while small
rolls can be used for an appetizer. I usually use a dinner roll size.
Left
over seasoned butter may be frozen for future use.
DIRECTIONS: Place a wok or large skillet over high heat,
and pour in 1 tablespoon vegetable oil.
Add onions and garlic; let cook for 2
minutes.
Brown ground beef (or cook the pork/minced meat.) Cook until slightly
brown. Drain grease from pan, leaving a thin coating.
Add carrots, bean sprouts, and cabbage.
Season with pepper, salt, and soy sauce.
Mix thoroughly. Remove from heat, and set
aside until cool enough to handle.
Can put in fridge to speed up cooling.
Place heaping tablespoons of filling near
one side of each wrapper, leaving a 1 1/2 inch space at both ends. Fold the
side along the length of the filling over the filling, tuck in both ends, and
roll neatly.
Keep roll tight as you assemble. Moisten
the other side of the wrapper with warm water to seal the edge. You can use a
combination of egg combined with a splash of soy sauce mixed well instead of
warm water to hold the ends together if you desire when sealing the lumpia like
an envelope.
Heat a heavy skillet over medium heat,
add oil to 1/2 inch depth, and heat for about 5 minutes or until temperature is
about 350o F. Slide lumpia into the oil until golden brown on all
sides. Takes about 1 to 2 minutes. Drain on paper towels. Serve immediately.
Can freeze up to 2 months. Here's a variation in this video: