Monday, December 10, 2012

Homemade graham cracker house!


The pressure of making your first gingerbread house can be immense. Baking and decorating a standing structure out of flour, water and sugar hardly seems possible. But I assure you, it is. It’s not about being overly fancy or complicated – it’s all about having fun with your family. A gorgeous house to gawk at over the holidays is just, well, icing on the cake. Here are a few tips and techniques I’ve figured out along the way about how to approach your first gingerbread house:
  • Kits Aren’t a Bad Idea: I buy gingerbread house kits a lot. With a toddler running around, there is only so much time I have to dedicate to measuring gingerbread templates. Don’t feel bad about picking one up for your first go around. This way you won’t have to worry about the most basic part of the project and you can skip ahead to the fun part – decorating!
  • Build a Strong Foundation: Since it’s highly likely your gingerbread house will be transported around your actual house, it’s a good idea to build it on a strong piece of plywood that is wider and longer than the gingerbread house by at least 4 inches. Wrap the board in aluminum foil and before proceeding any further, make sure it can hold the weight of the house. Or, you can build it on a tray with handles for easy carrying.
  • It’s All About the Icing: When assembling your house, remember that the icing is your glue. Your cement. Follow the directions very closely – you don’t want icing that is too thin or the house won’t stay together.
  • Let it Dry: Once the icing is on, be sure to dry it well. The rule is to dry the structure for at least 24 hours before decorating it. It may be hard to resist, but you want your icing to be rock-hard like cement before proceeding.
  • Divide and Conquer: Be wary of having a formal plan for your house d’cor. While you may want gumdrops to line the walkway, your little ones may have other ideas in mind. Remember, it’s all about fun. Also, it’s a good idea to put the candies in individual bowls to make it easier for little kids to grasp (and stay somewhat organized).
  • Dry and Dry Again: After decorating the house, let it sit undisturbed for at least 24 hours. The drying time for the icing is absolutely essential. After that you can move your house freely around the room, always taking care to handle the base with two hands.
  • Snack time! Most gingerbread houses are perfectly safe to eat, though you should check with the kit or recipe you use to be certain. The candies are especially fun to snap off and eat over the course of the holidays and it’s safe to do so. But be forewarned that the structure might fall apart if too much of the icing at the seams is removed. Of course, take precautions around small children in case of choking hazards. Enjoy and Happy Holidays!
Here's a great recipe for royal icing which will act as the glue for your gingerbread houses. Mix it up, put it in a quart size bag, add graham crackers and candy and enjoy your holiday memories.


Friday, November 23, 2012

How to Form Pizza Crust


Although making pizza is simple, there are still a few tricks that can help ease the process along.


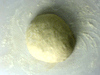
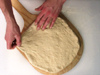
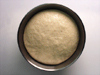
1. We used the recipe for Jay's Signature Pizza Crust. Once the dough has been formed and allowed to rise, uncover the dough and punch it down.

2. This recipe makes two pizza crusts or one very large crust. If you would rather make individual pizza pies, portion the dough into as many round balls as you want pies. Once the portions have been formed, cover and let the dough sit for 5 to 10 minutes to allow the gluten to relax before rolling the dough out.

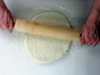
    3. Flour the surface of your work area to keep the dough from sticking. While you don't need to use a rolling pin to roll the dough out, it will help maintain a consistent thickness. Another approach is to pound the dough down with your fist or the palm of your hand--this is just a preliminary shaping, to form the dough ball into a disc.

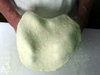
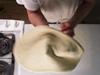
      4. Dust your hands with flour to keep the dough from sticking. Gently stretch the dough using the back of your floured hands, letting the weight of the dough pull the dough thinner. Use the backs of your fingers to push the dough out wider. Start in the middle of the dough with both hands close together, and slowly pull your hands apart, allowing the dough to glide above your hands. Turn the dough about 15 degrees on your hands and repeat this step until the dough is thinner, wider, and consistent throughout the entire circumference of the crust.

        5. Try spinning the dough in the air. This is certainly not required, but it's a lot of fun! It also helps to make the dough more round,.

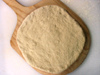
          6. Cover a bread peel (a rimless baking sheet or heavy square of cardboard will also work well) with either flour or corn meal. This flour layer is vital because it keeps the dough from sticking to the peel. Place the dough on the peel. Complete any final forming of the shape.

            7. Arrange whatever toppings desired onto the newly formed homemade crust.
            From: http://allrecipes.com/HowTo/Forming-Pizza-Crust/Detail.aspx

            Turkey Salad


            INGREDIENTS:
            3/4 pound cooked turkey meat
            2 stalks celery
            2 green onions
            1/2 fuji apple 
            3 tablespoons mayonnaise
            2 tablespoons prepared Dijon mustard
            1 teaspoon of cranberry sauce
            1 tablespoon cider vinegar/lemon juice
            1/4 teaspoon salt
            1/8 teaspoon pepper
            DIRECTIONS:
            1.Finely dice cooked turkey meat, celery, green onions and fuji apple.   Mix in mayonnaise, prepared Dijon-style mustard, cider vinegar/lemon juice, cranberry sauce and salt. Serve on rolls, croissant, or any leftover Thanksgiving bread.

            OR 
            2. If preferred, put in a blender or food processor. Transfer the turkey mixture to a medium bowl. Mix in mayonnaise, prepared Dijon-style mustard, cider vinegar/lemon juice , cranberry sauce and salt. Cover and refrigerate 8 hours, or overnight, before serving. This makes a great appetizing dip for crackers.

            More Turkey recipes for your Thanksgiving leftovers: http://www.simplyrecipes.com/turkey_leftovers/

            Thursday, November 22, 2012

            Perfect Mashed Potaotes

            WATCH! Helpful Video Link: http://allrecipes.com/video/325/perfect-mashed-potatoes/detail.aspx


            Perfect Mashed Potato Recipe
            Recipe Type: Potatoes
            Menu: Thanksgiving Turkey Dinner Menu
            Yields: 4 servings
            Prep time: 20 min
            Cook time: 20 min

            Ingredients:
            1 1/3 pounds (4 medium) Russet or Yukon Gold potatoes washed, peeled, and cut into uniform 2-inch chunks*
            1 teaspoon salt, divided
            2 tablespoons warm butter
            1/2 to 2/3 cup hot milk, half &  half, or cream**
            * Do not cut the potatoes into smaller chunks as too much water will be absorbed by the potatoes. After cutting the potatoes, immediately place in cold water to prevent discoloration of the potatoes.
            ** Buttermilk may be substituted.

            Preparation:
            In large saucepan, Add cut-up potatoes, 1/2 teaspoon salt, and just enough cold water until potatoes are covered; bring to a boil.  Reduce heat to medium; cover and let simmer 15 to 20 minutes or until potatoes are tender when pierced with a fork.
            While potatoes are cooking, either in another saucepan or microwave, heat butter.  Also heat hot milk or cream to a simmer (do not boil) separately from the butter in another saucepan or microwave. NOTE: Do not add cold butter or cold milk/cream to when making mashed potatoes.
            When the potatoes are cooked, remove from heat and immediately drain potatoes thoroughly in a colander. Return to saucepan; heat over medium-low heat approximately 1 to 2 minutes to dry potatoes, stirring occasionally.  NOTE: Boiled potatoes left in water will start to jellify and may even increase in volume, becoming swollen and watery. That is why it is important to let the potatoes drain for a couple of minutes in a colander immediately after they are cooked.

            In the same saucepan that the potatoes have been heated in, mash potatoes with a potato masher, potato ricer, fork, or beat with electric hand mixer until chunky.  Stir in warm butter, remaining 1/2 teaspoon salt, and 1/2 cup of the hot milk.  Add additional milk, a little at a time, if necessary, for desired consistency.

            Note: Gluey or gooey mashed potatoes are caused by vigorous over mashing, as anyone who has tried to make the side dish in a food processor can attest. When potatoes are boiled, their starch granules swell. If those granules are broken too vigorously, the cells release copious quantities of starch, resulting in a potatoes with the consistency of wallpaper paste.
            Season to taste with additional salt, if desired.

            Above recipe from: What's cooking America

            You're Doing It All Wrong : How to Make Mashed Potatoes video

            Mashed Sweet Potatoes with Sugared Walnuts


            MASHED SWEET POTAOTES
            4 medium sweet potatoes, peeled and coarsely chopped
            Nonstick cooking spray/oil
            1/4 cup (1/2 stick) butter
            3 tablespoons packed brown sugar
            1 teaspoon cinnamon
            1/4 cup milk
            1 teaspoon vanilla
            Salt and pepper to taste
            SUGARED WALNUTS
            1/3 cup packed brown sugar
            1/2 teaspoon cinnamon
            3 tablespoons butter, melted
            1 cup chopped walnuts

            For mashed sweet potatoes, place sweet potatoes in a large saucepan; cover with cold water. Bring to a boil. Reduce heat; cover loosely, and gently boil until tender, 10 to 15 minutes. Drain. Preheat oven to 350 degrees. Lightly coat a 2-quart casserole with nonstick cooking spray or oil. For mashed sweet potatoes, place cooked sweet potatoes in a large bowl. Add 1/4 cup butter, 3 tablespoons brown sugar, 1 teaspoon cinnamon, milk, and vanilla; mash until almost no lumps remain. Season with salt and pepper; transfer to prepared casserole.
            For sugared walnuts, in a small bowl combine 1/3 cup brown sugar, 1/2 teaspoon cinnamon, and 3 tablespoons melted butter. Stir in walnuts. Sprinkle over potato mixture; bake until potato mixture is set and walnut mixture has browned, 35 to 40 minutes. Makes 8 servings.

            Homemade Green Bean Casserole

            PREP, COOK, DRAIN & DRY the GREEN BEANS
            Step-by-Step Photos: How to Cook the Green Beans
            If doubling or tripling the recipe means cooking the beans in batches, start each batch with fresh water; at minimum, re-salt the water with each new batch. Also, don't skip the drying process.

            2 quarts (8 cups) water 
            1 tablespoon table salt (salt is key to the flavor so don't skimp; if you don't have table salt, use twice as much as the relatively 'less salty' kosher salt or sea salt)
            1 pound fresh green beans, ends snapped, snapped into bite-size pieces

            Bring the water to boil in a large pot or Dutch oven. While it comes to a boil, prep the beans. Fill a large bowl with ice water. Add the salt and beans to the boiling water. Cover and cook for 6 minutes or until crisp-tender and still bright green. (Be sure to cook the beans to your desired level of doneness; from here on, they will reheat but won't cook more.) Drain beans in a colander, then plunge into ice water to stop the cooking. Drain a bit in the colander again. Place a double layer of paper towels on a baking sheet, arrange beans in single layer to dry, top with a double layer of towels and pat to dry. Let continue to dry while finishing. 

            COOK the MUSHROOMS & MAKE the SAUCE
            Step-by-Step Photos: How to Cook the Mushroom Sauce
            If this looks a lot like a thick, homemade mushroom soup, that's because it is!

            8 ounces baby portabella mushrooms (I like the color of the brown portabella but taste-wise, they're the same as white button mushrooms)
            1 tablespoon unsalted butter 
            1 tablespoon fresh garlic, minced
            1 teaspoon kosher salt or to taste
            Generous grind of fresh pepper or to taste
            1 1/2 tablespoons flour
            3/4 cup chicken stock
            1 tablespoon dry sherry 
            3/4 cup half & half or heavy cream (don't use fat-free half-n-half, it won't thicken)
            Salt & pepper to taste

            Clean the mushrooms; break off and discard the stems. (Better yet, use the stems to make a night-before-Thanksgiving mushroom soup.) Break the mushroom tops into pieces. (Breaking the tops into irregular pieces is important to the texture of this sauce for sliced mushrooms have a 'canned soup' texture.) Melt the butter in a skillet til shimmery. (To save a pan, use the pot used for cooking the beans.) Add the mushrooms, garlic, salt and pepper. Stirring often, cook til mushrooms begin to soften and exude their liquid, about 6 minutes. Stir in flour and cook a minute. A tablespoon at a time at first, add the chicken stock and sherry; bring to a simmer. Add the half & half, simmer til sauce thickens, about 10 - 15 minutes. Taste and adjust the seasonings. Stir in the cooked beans til they're evenly distributed throughout the sauce.

            MIX the TOPPING
            Step-by-Step Photos: How to Mix the Topping and Bake
            Note: The quantity below is 'half' what the inspiring recipe used; the full amount seemed way over the top to me, half was plenty and hardly skimpy for the shallow quiche dish I use to bake this in. I use the quantity below even when doubling the beans and the mushroom sauce; how much is needed seems to be a function of the size of the serving dish; 'half' is perfect for that shallow quiche dish.

            1 slice good whole grain bread (I use this Light 'n' Fluffy Homemade Whole Grain Bread but any good whole-grain bread will work)
            1 tablespoon unsalted butter
            1/2 a 2.8 ounce can of French fried onions
            1/8 teaspoon table salt
            1/16 teaspoon freshly ground black pepper

            In the food processor, process the bread, butter and seasonings in about 10 quick pulses. Stir in the onions -- but don't process. If making ahead, transfer to a storage container and refrigerate.

            BAKE 
            TO BAKE RIGHT AWAY Preheat oven to 425F. Transfer hot bean mixture to a greased quiche pan or baking dish. Top the beans with the topping mixture and bake uncovered for 15 minutes.

            TO BAKE LATER Transfer bean mixture to a greased quiche pan or baking dish (hold off on the topping mixture), cover with plastic wrap and refrigerate. Return to room temperature. Remove plastic wrap. Heat in 425F oven uncovered for about 10 - 40 minutes until hot and bubbly. (Ten minutes is enough for a shallow dish like a quiche pan. Allow more time for a deeper dish.) Add topping and bake for another 15 minutes.

            ALANNA'S TIPS & KITCHEN NOTES
             FROZEN BEANS What about frozen green beans? In 2007, I had no choice but to make this with frozen whole (not Frenched) beans and they worked just fine; you can skip the ice water step but I do recommend the drying process. Still, fresh beans are preferred. 
             PRE-CUT BEANS What about bags of precut (supposedly) fresh beans? These never look that fresh, need to retrimmed anyway, and pound for pound are so expensive. It takes just a few minutes to snap the beans.
             CONSIDER AT LEAST A DOUBLE BATCH I nearly always make a double batch, using two pounds of green beans. This fills a shallow quiche pan that's my standard serving dish (what's pictured) that holds about five cups liquid. 
             TIMING for DOUBLE & TRIPLE BATCHES For larger gatherings, I've doubled and tripled this recipe. The prep is easy enough but the timing changes since it takes longer to bring the casserole to room temperature (allow 3 hours for a triple batch) and longer to heat it through (allow at least 30 - 40 minutes for a triple batch, especially one prepped in advance or not quite at room temperature). 
             TOPPING SUBSTITUTES I really like the topping from the original Cook's Illustrated recipe but know that not everyone can bear the idea of canned fried onions. A suitable substitute is 3/4 cups whole-grain fresh bread crumbs browned a bit in 1 tablespoon butter and seasoned generously with salt and especially pepper. Another suggestion comes from Elizabeth: "We've sautéed onions in oil until they are beginning to colour and then added flour to crisp them up. They are easily as good tasting (if not better) than canned onions and WAY better for us. Because who knows how many nightmares of chemicals and preservatives are in canned onions?" If it were me, I would still toss Elizabeth's onions with good bread crumbs and plenty of salt and especially pepper. I've also had great luck with the fried onions from Trader Joe's -- no ugly ingredients. 

            From A Veggie Venture Blog