Monday, December 10, 2012

Homemade graham cracker house!


The pressure of making your first gingerbread house can be immense. Baking and decorating a standing structure out of flour, water and sugar hardly seems possible. But I assure you, it is. It’s not about being overly fancy or complicated – it’s all about having fun with your family. A gorgeous house to gawk at over the holidays is just, well, icing on the cake. Here are a few tips and techniques I’ve figured out along the way about how to approach your first gingerbread house:
  • Kits Aren’t a Bad Idea: I buy gingerbread house kits a lot. With a toddler running around, there is only so much time I have to dedicate to measuring gingerbread templates. Don’t feel bad about picking one up for your first go around. This way you won’t have to worry about the most basic part of the project and you can skip ahead to the fun part – decorating!
  • Build a Strong Foundation: Since it’s highly likely your gingerbread house will be transported around your actual house, it’s a good idea to build it on a strong piece of plywood that is wider and longer than the gingerbread house by at least 4 inches. Wrap the board in aluminum foil and before proceeding any further, make sure it can hold the weight of the house. Or, you can build it on a tray with handles for easy carrying.
  • It’s All About the Icing: When assembling your house, remember that the icing is your glue. Your cement. Follow the directions very closely – you don’t want icing that is too thin or the house won’t stay together.
  • Let it Dry: Once the icing is on, be sure to dry it well. The rule is to dry the structure for at least 24 hours before decorating it. It may be hard to resist, but you want your icing to be rock-hard like cement before proceeding.
  • Divide and Conquer: Be wary of having a formal plan for your house d’cor. While you may want gumdrops to line the walkway, your little ones may have other ideas in mind. Remember, it’s all about fun. Also, it’s a good idea to put the candies in individual bowls to make it easier for little kids to grasp (and stay somewhat organized).
  • Dry and Dry Again: After decorating the house, let it sit undisturbed for at least 24 hours. The drying time for the icing is absolutely essential. After that you can move your house freely around the room, always taking care to handle the base with two hands.
  • Snack time! Most gingerbread houses are perfectly safe to eat, though you should check with the kit or recipe you use to be certain. The candies are especially fun to snap off and eat over the course of the holidays and it’s safe to do so. But be forewarned that the structure might fall apart if too much of the icing at the seams is removed. Of course, take precautions around small children in case of choking hazards. Enjoy and Happy Holidays!
Here's a great recipe for royal icing which will act as the glue for your gingerbread houses. Mix it up, put it in a quart size bag, add graham crackers and candy and enjoy your holiday memories.


Friday, November 23, 2012

How to Form Pizza Crust


Although making pizza is simple, there are still a few tricks that can help ease the process along.


1. We used the recipe for Jay's Signature Pizza Crust. Once the dough has been formed and allowed to rise, uncover the dough and punch it down.

2. This recipe makes two pizza crusts or one very large crust. If you would rather make individual pizza pies, portion the dough into as many round balls as you want pies. Once the portions have been formed, cover and let the dough sit for 5 to 10 minutes to allow the gluten to relax before rolling the dough out.

    3. Flour the surface of your work area to keep the dough from sticking. While you don't need to use a rolling pin to roll the dough out, it will help maintain a consistent thickness. Another approach is to pound the dough down with your fist or the palm of your hand--this is just a preliminary shaping, to form the dough ball into a disc.

      4. Dust your hands with flour to keep the dough from sticking. Gently stretch the dough using the back of your floured hands, letting the weight of the dough pull the dough thinner. Use the backs of your fingers to push the dough out wider. Start in the middle of the dough with both hands close together, and slowly pull your hands apart, allowing the dough to glide above your hands. Turn the dough about 15 degrees on your hands and repeat this step until the dough is thinner, wider, and consistent throughout the entire circumference of the crust.

        5. Try spinning the dough in the air. This is certainly not required, but it's a lot of fun! It also helps to make the dough more round,.

          6. Cover a bread peel (a rimless baking sheet or heavy square of cardboard will also work well) with either flour or corn meal. This flour layer is vital because it keeps the dough from sticking to the peel. Place the dough on the peel. Complete any final forming of the shape.

            7. Arrange whatever toppings desired onto the newly formed homemade crust.
            From: http://allrecipes.com/HowTo/Forming-Pizza-Crust/Detail.aspx

            Turkey Salad


            INGREDIENTS:
            3/4 pound cooked turkey meat
            2 stalks celery
            2 green onions
            1/2 fuji apple 
            3 tablespoons mayonnaise
            2 tablespoons prepared Dijon mustard
            1 teaspoon of cranberry sauce
            1 tablespoon cider vinegar/lemon juice
            1/4 teaspoon salt
            1/8 teaspoon pepper
            DIRECTIONS:
            1.Finely dice cooked turkey meat, celery, green onions and fuji apple.   Mix in mayonnaise, prepared Dijon-style mustard, cider vinegar/lemon juice, cranberry sauce and salt. Serve on rolls, croissant, or any leftover Thanksgiving bread.

            OR 
            2. If preferred, put in a blender or food processor. Transfer the turkey mixture to a medium bowl. Mix in mayonnaise, prepared Dijon-style mustard, cider vinegar/lemon juice , cranberry sauce and salt. Cover and refrigerate 8 hours, or overnight, before serving. This makes a great appetizing dip for crackers.

            More Turkey recipes for your Thanksgiving leftovers: http://www.simplyrecipes.com/turkey_leftovers/

            Thursday, November 22, 2012

            Perfect Mashed Potaotes

            WATCH! Helpful Video Link: http://allrecipes.com/video/325/perfect-mashed-potatoes/detail.aspx


            Perfect Mashed Potato Recipe
            Recipe Type: Potatoes
            Menu: Thanksgiving Turkey Dinner Menu
            Yields: 4 servings
            Prep time: 20 min
            Cook time: 20 min

            Ingredients:
            1 1/3 pounds (4 medium) Russet or Yukon Gold potatoes washed, peeled, and cut into uniform 2-inch chunks*
            1 teaspoon salt, divided
            2 tablespoons warm butter
            1/2 to 2/3 cup hot milk, half &  half, or cream**
            * Do not cut the potatoes into smaller chunks as too much water will be absorbed by the potatoes. After cutting the potatoes, immediately place in cold water to prevent discoloration of the potatoes.
            ** Buttermilk may be substituted.

            Preparation:
            In large saucepan, Add cut-up potatoes, 1/2 teaspoon salt, and just enough cold water until potatoes are covered; bring to a boil.  Reduce heat to medium; cover and let simmer 15 to 20 minutes or until potatoes are tender when pierced with a fork.
            While potatoes are cooking, either in another saucepan or microwave, heat butter.  Also heat hot milk or cream to a simmer (do not boil) separately from the butter in another saucepan or microwave. NOTE: Do not add cold butter or cold milk/cream to when making mashed potatoes.
            When the potatoes are cooked, remove from heat and immediately drain potatoes thoroughly in a colander. Return to saucepan; heat over medium-low heat approximately 1 to 2 minutes to dry potatoes, stirring occasionally.  NOTE: Boiled potatoes left in water will start to jellify and may even increase in volume, becoming swollen and watery. That is why it is important to let the potatoes drain for a couple of minutes in a colander immediately after they are cooked.

            In the same saucepan that the potatoes have been heated in, mash potatoes with a potato masher, potato ricer, fork, or beat with electric hand mixer until chunky.  Stir in warm butter, remaining 1/2 teaspoon salt, and 1/2 cup of the hot milk.  Add additional milk, a little at a time, if necessary, for desired consistency.

            Note: Gluey or gooey mashed potatoes are caused by vigorous over mashing, as anyone who has tried to make the side dish in a food processor can attest. When potatoes are boiled, their starch granules swell. If those granules are broken too vigorously, the cells release copious quantities of starch, resulting in a potatoes with the consistency of wallpaper paste.
            Season to taste with additional salt, if desired.

            Above recipe from: What's cooking America

            You're Doing It All Wrong How to Make Mashed Potatoes video

            Mashed Sweet Potatoes with Sugared Walnuts


            MASHED SWEET POTAOTES
            4 medium sweet potatoes, peeled and coarsely chopped
            Nonstick cooking spray/oil
            1/4 cup (1/2 stick) butter
            3 tablespoons packed brown sugar
            1 teaspoon cinnamon
            1/4 cup milk
            1 teaspoon vanilla
            Salt and pepper to taste
            SUGARED WALNUTS
            1/3 cup packed brown sugar
            1/2 teaspoon cinnamon
            3 tablespoons butter, melted
            1 cup chopped walnuts

            For mashed sweet potatoes, place sweet potatoes in a large saucepan; cover with cold water. Bring to a boil. Reduce heat; cover loosely, and gently boil until tender, 10 to 15 minutes. Drain. Preheat oven to 350 degrees. Lightly coat a 2-quart casserole with nonstick cooking spray or oil. For mashed sweet potatoes, place cooked sweet potatoes in a large bowl. Add 1/4 cup butter, 3 tablespoons brown sugar, 1 teaspoon cinnamon, milk, and vanilla; mash until almost no lumps remain. Season with salt and pepper; transfer to prepared casserole.
            For sugared walnuts, in a small bowl combine 1/3 cup brown sugar, 1/2 teaspoon cinnamon, and 3 tablespoons melted butter. Stir in walnuts. Sprinkle over potato mixture; bake until potato mixture is set and walnut mixture has browned, 35 to 40 minutes. Makes 8 servings.

            Homemade Green Bean Casserole

            PREP, COOK, DRAIN & DRY the GREEN BEANS
            Step-by-Step Photos: How to Cook the Green Beans
            If doubling or tripling the recipe means cooking the beans in batches, start each batch with fresh water; at minimum, re-salt the water with each new batch. Also, don't skip the drying process.

            2 quarts (8 cups) water 
            1 tablespoon table salt (salt is key to the flavor so don't skimp; if you don't have table salt, use twice as much as the relatively 'less salty' kosher salt or sea salt)
            1 pound fresh green beans, ends snapped, snapped into bite-size pieces

            Bring the water to boil in a large pot or Dutch oven. While it comes to a boil, prep the beans. Fill a large bowl with ice water. Add the salt and beans to the boiling water. Cover and cook for 6 minutes or until crisp-tender and still bright green. (Be sure to cook the beans to your desired level of doneness; from here on, they will reheat but won't cook more.) Drain beans in a colander, then plunge into ice water to stop the cooking. Drain a bit in the colander again. Place a double layer of paper towels on a baking sheet, arrange beans in single layer to dry, top with a double layer of towels and pat to dry. Let continue to dry while finishing. 

            COOK the MUSHROOMS & MAKE the SAUCE
            Step-by-Step Photos: How to Cook the Mushroom Sauce
            If this looks a lot like a thick, homemade mushroom soup, that's because it is!

            8 ounces baby portabella mushrooms (I like the color of the brown portabella but taste-wise, they're the same as white button mushrooms)
            1 tablespoon unsalted butter 
            1 tablespoon fresh garlic, minced
            1 teaspoon kosher salt or to taste
            Generous grind of fresh pepper or to taste
            1 1/2 tablespoons flour
            3/4 cup chicken stock
            1 tablespoon dry sherry 
            3/4 cup half & half or heavy cream (don't use fat-free half-n-half, it won't thicken)
            Salt & pepper to taste

            Clean the mushrooms; break off and discard the stems. (Better yet, use the stems to make a night-before-Thanksgiving mushroom soup.) Break the mushroom tops into pieces. (Breaking the tops into irregular pieces is important to the texture of this sauce for sliced mushrooms have a 'canned soup' texture.) Melt the butter in a skillet til shimmery. (To save a pan, use the pot used for cooking the beans.) Add the mushrooms, garlic, salt and pepper. Stirring often, cook til mushrooms begin to soften and exude their liquid, about 6 minutes. Stir in flour and cook a minute. A tablespoon at a time at first, add the chicken stock and sherry; bring to a simmer. Add the half & half, simmer til sauce thickens, about 10 - 15 minutes. Taste and adjust the seasonings. Stir in the cooked beans til they're evenly distributed throughout the sauce.

            MIX the TOPPING
            Step-by-Step Photos: How to Mix the Topping and Bake
            Note: The quantity below is 'half' what the inspiring recipe used; the full amount seemed way over the top to me, half was plenty and hardly skimpy for the shallow quiche dish I use to bake this in. I use the quantity below even when doubling the beans and the mushroom sauce; how much is needed seems to be a function of the size of the serving dish; 'half' is perfect for that shallow quiche dish.

            1 slice good whole grain bread (I use this Light 'n' Fluffy Homemade Whole Grain Bread but any good whole-grain bread will work)
            1 tablespoon unsalted butter
            1/2 a 2.8 ounce can of French fried onions
            1/8 teaspoon table salt
            1/16 teaspoon freshly ground black pepper

            In the food processor, process the bread, butter and seasonings in about 10 quick pulses. Stir in the onions -- but don't process. If making ahead, transfer to a storage container and refrigerate.

            BAKE 
            TO BAKE RIGHT AWAY Preheat oven to 425F. Transfer hot bean mixture to a greased quiche pan or baking dish. Top the beans with the topping mixture and bake uncovered for 15 minutes.

            TO BAKE LATER Transfer bean mixture to a greased quiche pan or baking dish (hold off on the topping mixture), cover with plastic wrap and refrigerate. Return to room temperature. Remove plastic wrap. Heat in 425F oven uncovered for about 10 - 40 minutes until hot and bubbly. (Ten minutes is enough for a shallow dish like a quiche pan. Allow more time for a deeper dish.) Add topping and bake for another 15 minutes.

            ALANNA'S TIPS & KITCHEN NOTES
             FROZEN BEANS What about frozen green beans? In 2007, I had no choice but to make this with frozen whole (not Frenched) beans and they worked just fine; you can skip the ice water step but I do recommend the drying process. Still, fresh beans are preferred. 
             PRE-CUT BEANS What about bags of precut (supposedly) fresh beans? These never look that fresh, need to retrimmed anyway, and pound for pound are so expensive. It takes just a few minutes to snap the beans.
             CONSIDER AT LEAST A DOUBLE BATCH I nearly always make a double batch, using two pounds of green beans. This fills a shallow quiche pan that's my standard serving dish (what's pictured) that holds about five cups liquid. 
             TIMING for DOUBLE & TRIPLE BATCHES For larger gatherings, I've doubled and tripled this recipe. The prep is easy enough but the timing changes since it takes longer to bring the casserole to room temperature (allow 3 hours for a triple batch) and longer to heat it through (allow at least 30 - 40 minutes for a triple batch, especially one prepped in advance or not quite at room temperature). 
             TOPPING SUBSTITUTES I really like the topping from the original Cook's Illustrated recipe but know that not everyone can bear the idea of canned fried onions. A suitable substitute is 3/4 cups whole-grain fresh bread crumbs browned a bit in 1 tablespoon butter and seasoned generously with salt and especially pepper. Another suggestion comes from Elizabeth: "We've sautéed onions in oil until they are beginning to colour and then added flour to crisp them up. They are easily as good tasting (if not better) than canned onions and WAY better for us. Because who knows how many nightmares of chemicals and preservatives are in canned onions?" If it were me, I would still toss Elizabeth's onions with good bread crumbs and plenty of salt and especially pepper. I've also had great luck with the fried onions from Trader Joe's -- no ugly ingredients. 

            From A Veggie Venture Blog

            Saturday, November 3, 2012

            Basic Tortellini Recipe


            Making Homemade Pasta - Taste of Home Magazine

            Precise step by step instructions in English 8)


            Noodle Basics

            Fresh pasta contains only three ingredients: flour, salt, and eggs.
            • Semolina, a high-protein flour made from Durum wheat, makes better pasta than all-purpose flour. It creates a stronger gluten structure, allowing for more pliable dough.
            • Salt provides flavor, and the eggs create richer dough, along with binding the dough together.
            • Olive oil is sometimes added for flavor, or, if the pasta is to be dried, water is used instead of eggs.

            Mixing

            Kneading the dough creates the important gluten structure that holds the pasta together. Using a stand mixer with a dough hook simplifies the process: just add the ingredients and mix. Kneading by hand takes more effort, but is still quite enjoyable (and a good workout).
            • Start with a large, clean work surface. Make a mound of the flour and salt with a well in the middle.
            • Add the eggs to the well, and start stirring with a fork, slowly incorporating all the flour until the dough comes together.
            • Knead the dough until it is soft and pliable. This might take several minutes.

              Rolling

              A pasta machine is a pasta maker's best friend. Just follow these tips for flawless dough:
              • Use the machine for the final kneading. Run the dough through the widest setting on the machine, fold into thirds, and roll again. Continue this process until the dough is shiny and elastic.
              • Work the dough through the settings of the machine until the desired thickness is reached.
              • Four hands are better than two: enlisting some help with turning the handle of the pasta machine will make this job much easier.
              • If you're working with only a portion of the dough at a time, keep the remainder wrapped in plastic to prevent it from drying out.

              Rolling by hand works, too, and can easily be done with just a rolling pin and a large work surface.
              • Just as with a pasta machine, roll the pasta dough flat, fold into thirds, and roll flat again, until the dough is shiny and elastic.
              • Make sure the dough is in small enough batches to be workable. (Slightly smaller than your fist is a good gauge.) Keep extra dough covered in plastic until you're ready to work with it.
              • Roll to the final thickness, and form desired shape.

              Try these recipes for fresh pasta:

              Shaping

              Fresh pasta allows you to choose your favorite shape of pasta, in any size you choose.
              • Any sort of thin, flat pasta is possible when making pasta by hand, including lasagna, fettuccine, or linguine.
              • Complex shapes, such as penne, spaghetti, or macaroni requite special cutters and attachments added to the pasta machine.
              • Filled pastas, such as ravioli or tortellini, are perfect for fresh-made pasta. You can fill them with anything you choose, and create the best pairing possible between filling and sauce.

              Homemade pasta lessons from the Italians!


              Friday, November 2, 2012

              Autumn Tea

              made by Lois W.

              5 tea bags
              5 cups boiling water
              5 cups unsweetened apple juice
              2 cups cranberry juice
              1/3 cup lemon juice
              1/2 cup sugar
              1/4 tsp pumpkin pie spice

              Brew tea in boiling water for 8-9 minutes
              Add rest of ingredients.
              Serve warm or cold. 

              Mixed Bery Cobbler (Low Fat)

              brought by Jerra H.

              1/2 cup sugar
              1/2 cup brown sugar
              1/2 cup all purpose flour
              1/2 cup whole wheat flour
              1 tsp baking powder
              1 cup skim milk (I usually use Almond milk)
              1 egg white (I used 1 "flax egg" ----->1 egg =1T ground flax & 3 T water)
              2 cups blackberries (or other mixed berries)

              Preheat oven to 350 degrees and spray 7" x 9" pan.
              In medium bowl mix all ingredients together well,
              except blackberries and pour into pan.
              Place blackberries on top of the batter.
              (If frozen, allow them to partially defrost.)
              Bake around 45-50 minutes or until golden brown. 

              Mocha Pie

              brought by Amy S.

              Crust:
              25 Oreos
              3/4 stick of butter

              -Crush Oreos in a food processor and pour melted butter over the crumbs. Press into a greased pie dish to form pie crust.

              Filling:
              1 Cup chocolate chips
              8 oz. cream cheese
              1/3 cup brown sugar
              1 TBS instant coffee dissolved
              1/8 tsp salt
              1 tsp vanilla
              2 eggs separated
              1/4 cup brown sugar
              2 Cups whipped cream

              -Beat egg whites until soft peaks form
              -Beat in 1/4 cups brown sugar until soft peaks form again; set aside
              -Melt chocolate chips; set aside
              -Beat cream cheese, brown sugar, coffee, vanilla, and salt on low speed until smooth
              -Add eggs yolks and melted chocolate and beat till smooth
              -Fold in egg whites and whipped cream
              -Pour in pie shell and freeze 8 hours
              -Garnish with whipped cream and hot fudge

              Crescent Roll Cake

              brought by Lindsay M.

              Ingredients:
              2  8oz (16 oz.)  pkgs of cream cheese
              1/2 cup of sugar
              1 egg yok (save the whites to brush over top)
              2 cans of crescent rolls (1 for top/ 1 for bottom)
              1 tsp vanilla
              -Mix cream cheese, sugar,  vanilla and egg yolk until creamy.
              -Lay down 1 can of crescent rolls.
              -Put cream cheese mixture in between.
              -Put 1 roll of crescent rolls on top.

              Bake at 350 degrees for 20-30 minutes

              Icing:
              1 cup powdered sugar
              3 tbs milk
              1 tsp vanilla

              Pumpkin Crunch Dessert

              brought by Robin W.

              1 box yellow cake mix

              1 can (15oz.) solid pack pumpkin
              1 can evaporated milk
              3 lg. eggs
              1 c. butter (melted)
              1 ½ c sugar
              1 t. cinnamon
              ½ t. salt
              ½ c. chopped pecans
              Whipped topping for garnish

              Prepare oven to 350.  Spray bottom of 9x13 pan.  Combine pumpkin, milk, eggs, sugar, cinnamon and salt in a large bowl.  Pour into baking pan.  Sprinkle dry cake mix evenly over the pumpkin mixture.  Top with chopped pecans.  Drizzle melted butter over pecans.  Bake for 50-55 minutes or until golden brown.  Cool, served chilled.  Top with whipped topping when served. 
              It is also good served warm.  You can also add a little nutmeg to the pumpkin mixture. 
              For larger crowd, it can be made in a 10x15 pan.  Double everything for the pumpkin mixture but use the same amount of pecans and butter.  Serves 15-18 this way and the pumpkin layer is thicker.  Bake 15-20 minutes longer.

              Pumpkin iced cookies

              brought by Sarah K.

              Ingredients:
              2 1/2 cups all purpse flour
              1 tsp baking powder
              1 tsp baking soda
              2 tsp ground cinnamon
              1/2 tsp ground nutmeg
              1/2 tsp ground cloves
              1/2 tsp salt
              1/2 cup softened butter
              1 1/2 cups white sugar
              1 cup canned pumpkin puree
              1 egg
              1 tsp vanilla extract

              Frosting:
              2 cups confectioners sugar
              3 tbs milk
              1 tbs milted butter
              1 tsp vanilla extract

              1. Preheat oven to 350 degrees.
              Combine flour, baking powder, baking soda, cinnamon, nutmeg, cloves and salt; set aside.

              2. In medium bowl, cream butter and sugar.
              Add pumpkin, egg, and vanilla.
              Beat until creamy.
              Mix in dry ingredients.
              Drop on cookie sheet by tablespoonful, flatten slightly.

              3. Bake 15-20 minutes.
              Cool cookies, then drizzle glaze with fork.

              4. Glaze: combine confectioners sugar, milk, butter, and vanilla.
              Add ,milk as needed to achieve drizzling consistency.

              Cranberry Orange Pound Cake

              (by Sheree Swistun, Winnipeg, Manitoba)
              made by Lois W.

              1 1/2 cups butter (no substitutes), softened
              2 3/4 cups sugar
              6 eggs
              1 tsp vanilla extract
              2 1/2 ts grated orange peel
              3 cups all purpose flour
              1 tsp baking poder
              1/2 tsp salt
              1 cup (8 oz) sour cream
              1 1/2 cup chopped fresh or frozen cranberries

              Vanilla Butter Sauce:
              1 cup sugar
              1 tbs all purpose flour
              1/2 cup half & half cream
              1/2 cup butter (no substitutes), softened
              1/2 tsp vanilla extract

              In a mixing bowl, cram butter.
              Gradually beat in sugar until light and fluffy, about 5-7 minutes. Add eggs, one at a time, beating well after each addition. Stir in vanilla and orange peel. Combine flour, baking powder and salt; add to the creamed mixture alternately with sour cream. Beat on low just until blended. Fold in cranberries. Pour into a greased and floured 10-inch fluted tube pan. Bake at 350 degrees for 65-70 minutes or until a wooden pick inserted near the center comes our clean. Cool in pan for 10 minutes; remove to a wire rack and cool completely. In  a small saucepan, combine sugar and flour. Stir in cream and butter; bring to a boil over medium heat, stirring constantly. Boil for 2 minutes. Remove from the heat and stir in vanilla. Serve warm over cake. Yield: 16 servings (1 1/2 cups sauce).

              Saturday, October 27, 2012

              It's good to learn about cultural etiquette...


              HSBC bank has funny commericals on cultural etiquette on youtube.
              See the importance of knowing the culture you are in.

              Russian Etiquette on meeting...


              Comedian talking of Filipino dining

              Comic approach to some truths about Filipino dining

              Formal Dining etiquette


              Dining etiquette


              Dining Invitation Etiquette in China

              Don't rude... 
              Graciously say "no" the first time if a national Chinese person invites you to a meal.
              That's the polite thing to do!
              Why? Watch and discover...

              Gestures, meanings and cultures

              Be aware of the culture you are in and what your actions mean...

              Everything you want to know about spuds...

              Go to www.pototoes.com for more info on potoatoes!

              Selection & Cooking

              SELECT THE RIGHT SPUD

              Washington grows the perfect potato for almost every fresh or processed use. Potato characteristics are grouped by variety, by skin color, by shape and by use.Two important qualities of each variety determine the best way to prepare it. These are:
              • Starch content
              • Moisture content
              High starch/low moisture potatoes are also described as having high solids. Washington russet varieties average 20-23 percent solids and are best for baking, mashing, frying or pureeing. The cooked potato is described as dry, fluffy and mealy. This is because the large starch granules absorb the internal moisture as they cook, then expand and burst, creating the mealy texture that results in fluffy baked potatoes, light mashed and pureed potatoes and crisp-outside-fluffy-inside French fries.High starch/low moisture Russet Burbanks are preferred for French frying because their low sugar content keeps them from discoloring as they fry and because starch on the surface of the cut potatoes expands with the heat and dries the surface as it absorbs water from the potato. The result is a crisp skin with a fluffy interior. Fries made from high moisture varieties (reds) go limp because the internal moisture content turns to steam as they cook. Early season Russet Norkotahs, though light-frying, have lower solids than Burbanks, so have to be watched for oil absorption during frying. Norkotahs increase in sugar content during storage, so those coming out of storage in the spring and summer may darken when fried.
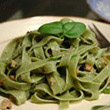
              Low to medium starch/high to medium moisture potatoes are frequently described as waxy and are preferred for boiling, steaming, braising, stewing, in salads, slices and those preparations where it’s important that the potato pieces hold their shape through the cooking process. Lower starch potatoes (reds, yellows) absorb less water when cooked. Their cells do not separate and swell but remain firm and waxy. These potatoes are described as smooth, creamy and moist.
              New Potatoes are freshly harvested tiny potatoes of any variety. Their skin is tender, and they do not need to be peeled. Small round red potatoes are often mistakenly identified as new potatoes. New potatoes are best used soon after harvest, boiled, steamed or roasted.

              VarietyCooking Method
              Russets
              Whites, Yellows
              Reds
              Bake, mash, French fry
              All-purpose
              Boil

              PURCHASING POTATOES

              Whatever the variety, look for potatoes that are firm, smooth and fairly clean. Avoid those with wrinkled or wilted skins, soft dark areas, discoloration, cut or bruised surfaces or greening.When purchasing potatoes consider:
              • Storability
              • Menu use
              • Cooking method
              • Plate presentation
              • Flavor
              • Color
              Then specify by:
              • Variety
              • Size
              • Grade
              • Number of (50-pound) cartons
              For example, for 140 baked potatoes, each to be served on a 10- to 12-inch plate with a 6- to 8-ounce portion of meat or fish, specify:
              Washington Norkotahs, 70 count,
              Grade No. 1, 2 (50-lb.) cartons

              HANDLING

              At receiving, check the shipment against specs for variety, size/count, number and condition of boxes.
              • Avoid green tinged, sprouted or bruised potatoes.
              • Handle with care - do not throw or drop boxes as potatoes can bruise easily.
              • Move immediately into proper storage.

              STORAGE

              The right storage conditions will help potatoes maintain their quality.Store potatoes for all uses except French frying (see below) in a cool (42-45°F), dark, well-ventilated area, away from strong-smelling produce, preferably in closed or covered cartons and on pallets for air circulation.
              Store away from other fruits and vegetables, especially onions as they may transfer odors and gases that affect quality.
              • DO NOT refrigerate
              • DO NOT freeze
              • HANDLE carefully - potatoes can bruise
              • DO NOT wash potatoes until ready to peel or prepare
              Here’s why:
              Temperatures warmer than 45°F encourage sprouting and shriveling; colder than 42°F encourage transformation of starch to sugar, which changes the taste and the cooking properties. There is one exception - see Storage for Potatoes to Be French Fried.
              Keep them in the dark. Storage in direct light can produce greening (actually the production of chlorophyll) which gives a bitter flavor and, in very large quantities, can be harmful to eat. Trim or peel small green spots before preparation. Discard very green potatoes.
              Storage for Potatoes To Be French Fried. For the very best French fries, Washington russet potatoes should be stored at 45°-50°F from harvest until ready to use. If stored at temperatures below 45° (in a refrigerator, for example) the starch turns to sugar and the fries will turn dark, caramelize and soak up the cooking oil, making them greasy when cooked. Potatoes out of storage in the late fall/early winter are best for fresh-cut French fries.
              Preparation

              • Wash well in warm running water and scrub with clean vegetable brush. Do not break the skin. Scrub new potatoes gently - their skin is tender. Potatoes can be arranged flat in dish racksand run through the dishwasher WITHOUT detergent.
              • Trim off any sprouts and peel any green tinged portion.
              • Unless recipe directs otherwise, cook with peels on.
              • See Basic Cooking Methods (below).


              DISCOLORATION

              Uncooked cut or peeled potatoes will discolor due to exposure to the air. The potatoes may first turn pink, then brownish, then dark gray. None of the discoloration is harmful and usually disappears during cooking. To prevent discoloration, keep cut potatoes covered with cold water until ready to use - up to two hours. Holding longer than two hours will reduce some of the valuable water soluble nutrients.Cooked potatoes sometimes develop grey/blue/black areas as they cool. Just trim away the discolored portions.
              Temperature changes during the growing season may cause some potatoes to develop harmless dark spots in the center. Just cut out and discard - the potatoes are safe to eat.

              BASIC COOKING METHODS

              When cooking Washington potatoes, remember to:
              • Select the variety, grade and size best suited to the cooking method
              • Select similar sized potatoes or cut potatoes into similar sizes and shapes for even cooking
              • Keep pre-sliced or pre-cut potatoes covered in cold water to prevent discoloration
              • When cooking in water, start potatoes in cold water so they will cook evenly

              BAKE
              (Russets, Grade No. 1)
              Foil or not? Not! Experts agree that wrapping potatoes in foil for baking actually increases the cooking time and, because the steam is trapped, makes the skin and flesh soggy.
              • Scrub well. Rub each potato lightly with cooking oil.
              • Pierce each potato several times with a fork so steam can escape.
              • Arrange in an even layer on a baking sheet for easier handling.
              • Conventional Oven - Bake at 425°F for 50 to 55 minutes for 90 count.
              • Convection Oven - Bake at 375°F for 50 to 55 minutes.
              Larger potatoes will take longer to cook. Those cooked on a baking sheet may need turning for even cooking. Potatoes are done if tender when pierced with a fork and the internal temperaturereaches 210°F. Keep in a warming drawer or under a heat lamp for no more than 20 minutes before serving. Wrapping potatoes in foil after cooking does help hold temperature, but will also soften skin.
              To serve, cut cross in top, then squeeze ends and push to center. Fluff center with a fork.


              STEAM
              (Reds, Whites, Yellows, Blues, Grade No. 1 if served whole and unpeeled, may use Grade No. 2 if peeled, sliced or cut)
              Scrub well. Place on rack over 1/2 inch boiling water or in steamer tray. Cover tightly or close steamer. Steam until tender.
              • Pressure Steamer - 25 to 30 minutes for 6 pounds.
              • Convection Steamer - 40 to 45 minutes for 6 pounds.
              Potatoes to be steamed can be peeled before or after cooking.


              BOIL
              (All Varieties, Grade No. 1 if served whole and unpeeled, may use Grade No. 2 if peeled, sliced or cut)
              Scrub well. Cut into quarters or even-sized pieces. Put in pot and add cold water to completely cover potatoes. Add salt. Heat to boiling, then reduce heat and simmer until tender when pierced with a fork, 20 to 30 minutes, depending on size. Drain thoroughly.To dry potatoes before mashing or other preparations, return to pot and place, uncovered, over very low heat OR return to pot and place paper towel or cloth towel between pot and lid OR arrange in single layer on sheet pan and hold in warm oven. Remove skin as soon as potatoes are cool enough to handle.
              Note: for preparations using distinct pieces, drain in small portions. Dumping a large amount into a colander to drain will crush pieces at bottom of colander - not a problem for mashed or pureed potatoes, but not good for salad pieces.


              FRENCH FRYING
              (Russets, Grade No. 2)
              See Storage and be sure potatoes have been stored between 45°-50°F.Scrub potatoes well. Peel or not? Some menus now feature fries with peel on. Cut into desired shape - usually 3/8-inch thick. For crisp finished fries, chill peeled, cut potatoes in cold water to cover, with lemon juice or vinegar (1 ounce per gallon water) added to water to prevent darkening, for 1/2 to 2 hours before frying. Rinse, then drain well or spin dry and dry on paper towels. (Any moisture on potatoes will cause oil to spatter and can be dangerous.)
              Heat high quality vegetable oil in 5-gallon fryer to 375°F. Add 2 pounds prepared potatoes to fryer basket, put into hot oil and cook until golden brown and cooked through, about 4 to 5 minutes.
              Lift basket out of oil and drain. Turn into paper towel-lined pan. Season with salt.
              For Blanched or Double Fried Potatoes, prepare as above. Blanch by frying at 350°F until tender but not brown, about 2 to 3 minutes. Drain well and turn out onto paper towels. Let cool to room temperature or refrigerate, uncovered, until ready to fry for service. At service time, deep fry at 375°F until golden brown and crisp, about 2 minutes. Drain well. Season with salt.
              Do not hold under warming lights or in warming cabinet more than 5 minutes.
              Note: Do not salt potatoes before frying or while in fryer. Salt causes the oil to break down.

              ROAST
              (Russets, Reds, Yellows, Whites, Blues, Grade No. 1 or 2 depending on if peeled and cut)
              Scrub potatoes well. Peel or not, depending on desired usage and appearance. Dry peeled potatoes. Leave whole or cut into even-sized pieces. Brush or toss with vegetable oil or other fat (roast drippings, clarified butter, poultry fat) and salt. Sprinkle with herbs, if desired. Pierce whole potatoes. Arrange in single layer in roasting pan, leaving a little space between each potato for even browning. Roast at 425°F in conventional oven, stirring several times for even browning, until tender, about 1 hour for 6-ounce potatoes.


              MASH
              (Russets, Whites, Yellows, Grade No. 2)
              Scrub potatoes well. Pare or not. Cut into quarters or even sized chunks and cook as follows: (times are based on 6 pounds of potatoes)
              • Steam jacketed kettle in boiling salted water to cover until tender, about 20 to 30 minutes, depending on size. Start in cold water for even cooking.
              • Pressure steamer - 25 to 30 minutes.
              • Convection steamer - 40 to 45 minutes.
              • Range top in boiling salted water to cover, until tender, about 60 minutes. Start in cold water for even cooking.
              Drain well, keep hot. Turn into mixer bowl and add hot milk, butter, salt and pepper. Whip 1 minute at low speed and 1 minute at high speed. Never over beat as that will breakdown the starch, and potatoes will become shiny and sticky.For fluffier mashed potatoes, press potatoes through food grinder, food mill or ricer before mixing, or hand mash, then mix with hot milk, butter salt and pepper. Hold mashed potatoes, covered, on preheated steam table or warmer or in water bath for no more than 60 minutes.
              To prepare mashed potatoes from leftover baked/cooked potatoes, steam until heated through, then mash as above.


              SAUTÉ: HOME FRIES, PANCAKES, HASH BROWNS, ANNA
              (Whites, Yellows, Reds, Grade No. 2)
              Scrub potatoes well. Pare or not. Hold in cold water if prepared in advance, then drain well and pat dry. Par-cook by boiling or steaming, if desired. Cut into 1/4- to 1/2-inch slices, shreds or 3/4-inch cubes. Use skillet large enough to hold potatoes without crowding. Add enough oil to skillet to cover bottom and heat until oil is hot. Arrange potatoes in single layer in skillet. Cover and cook over medium heat until browned and tender, about 10 minutes if not pre-cooked. Stir or shake pan to brown potatoes evenly.Cook hash browns on 375°F grill. Do not hold more than 5 to 10 minutes before serving.


              MICROWAVE BAKE
              (Russets, Grade No. 1)
              Scrub potatoes and pierce as for baked potatoes. Wrap each potato in microwave safe paper towel. Place end to end in single layer in circle in oven with about 1 inch between each potato. Cooking time will vary with size of potato and wattage of oven. Microwave on High.Turn potatoes over and change position in the oven halfway through the cooking time. Let stand, still in paper towels, 5 minutes to complete cooking. Times below are for 8-ounce potatoes in 1000 watt oven
              • 1 potato — 5 minutes.
              • potatoes — 7 - 8 minutes.
              • potatoes — 13 - 15 minutes.

              SCALLOPED/AU GRATIN
              (Reds, Yellows, Whites, Grade No.2)
              Scrub, peel and slice potatoes 1/8- to 1/16-inch thick and layer in buttered or oiled hotel pans. Par-cook potatoes in liquid to be used for sauce, if desired, to shorten total baking time. Drain par-cooked potatoes, reserving liquid to prepare white or cheese sauce. Pour hot white or cheese sauce over potatoes in pans, shaking pans gently to distribute liquid. Scatter buttered bread crumbs over top for au gratin potatoes.Bake at 325°F in conventional oven until potatoes are tender and top is golden brown, about 1 hour. If potatoes are done before top browns, run under salamander or broiler to brown top. Let stand about 10 minutes before cutting squares to serve.